Restoring Vintage Fiberglass Eames Chairs
We recently decided to upgrade our second-hand, fake Eames chairs with originals. We got the fake ones for free off of a neighborhood Buy Nothing group, and while they served their purpose for a few years, they developed a bit of a problem: the cats grew to love their padded seats so much that we had to start putting tinfoil on them, which is kind of a pain in the ass.
Our first reflex was to head over to the Herman Miller site and see what colors were available. These chairs come in plastic or fiberglass, but you really want the fiberglass ones because they just look so much nicer. These fiberglass models went out of production in 1989 because of environmental concerns about the manufacturing process, but they returned in a more eco-friendly formulation in 2013. Herman Miller does not offer these new fiberglass models in many colors, but to our delight, they listed a Seafoam Green that looked great. We placed an order for six of them and thought we’d be on our way.
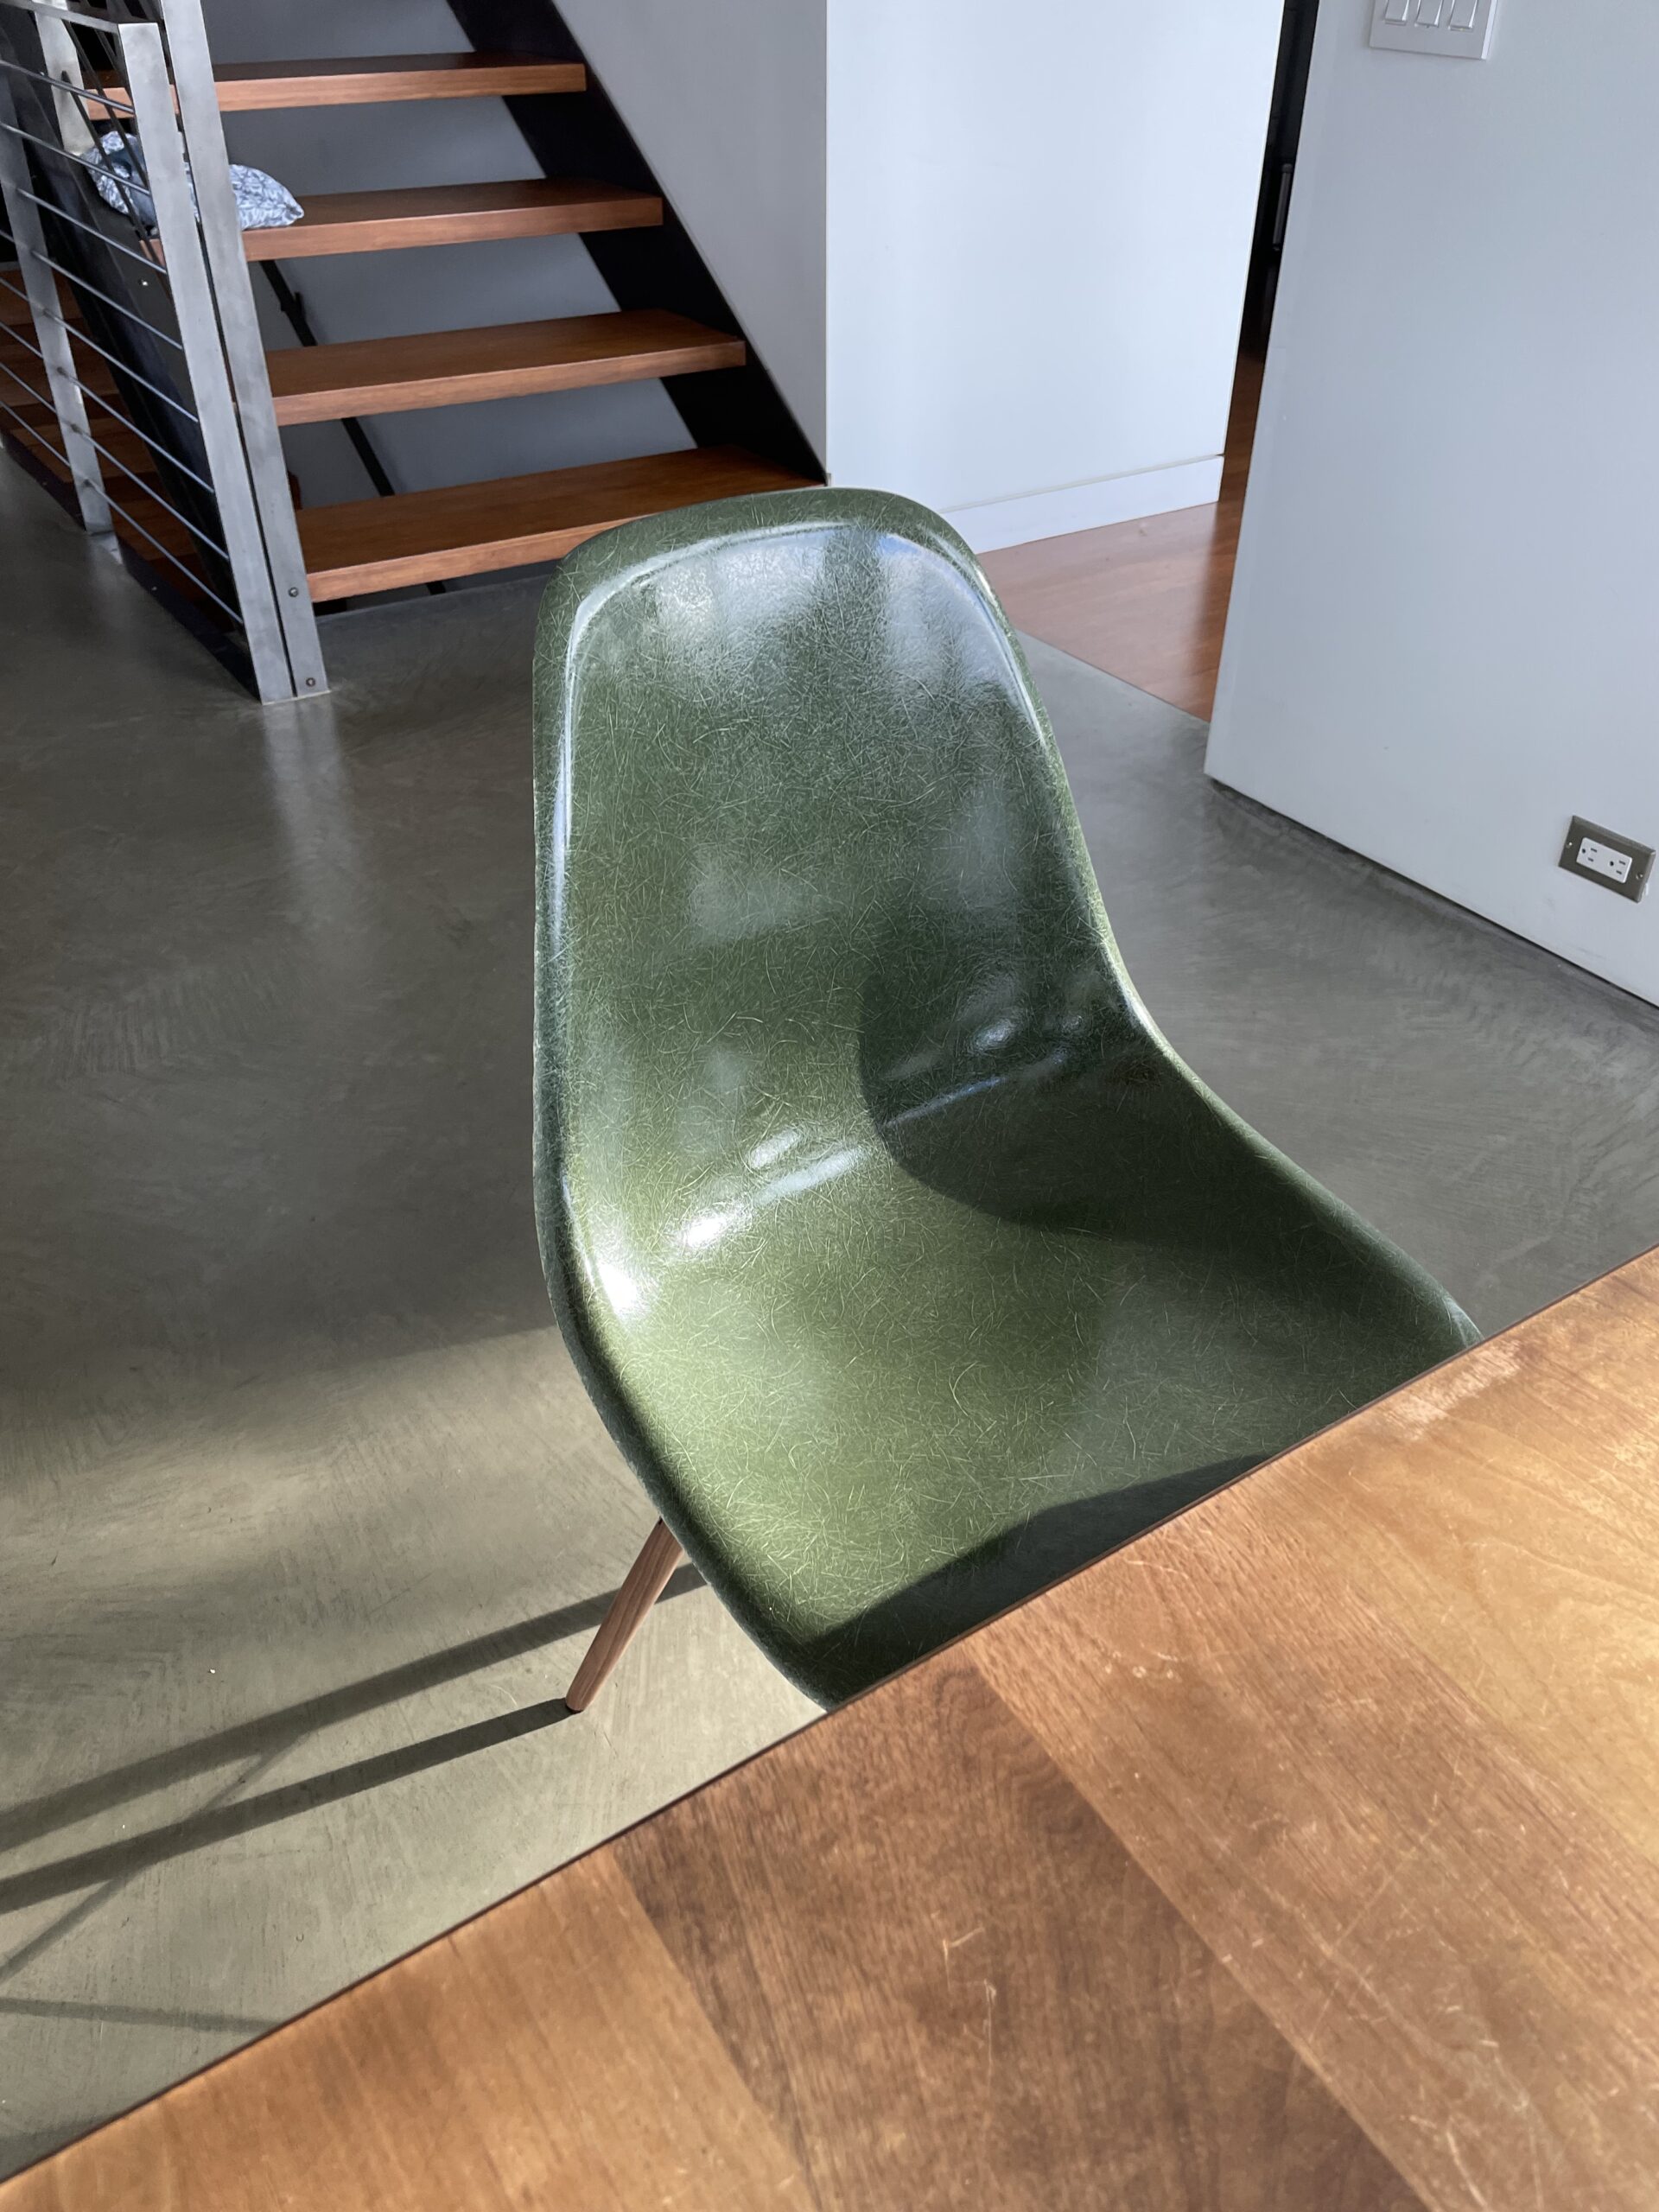
Unfortunately, after many months of delays (damn you, supply chain!), the chairs were still nowhere on the horizon, so we did what we should have done all along: look for vintage ones in good condition. After searching a bunch of different auction sites, we found Eames.com, a marketplace of used Eames items. They have a pretty good selection, and they happened to have six chairs in an Olive Green color that we liked even more than the Seafoam Green.
Their site does not list the United States as a shippable destination, but they agreed to ship us some chairs for about $400 each including shipping, which was quite a bit less than they would have cost from Herman Miller.
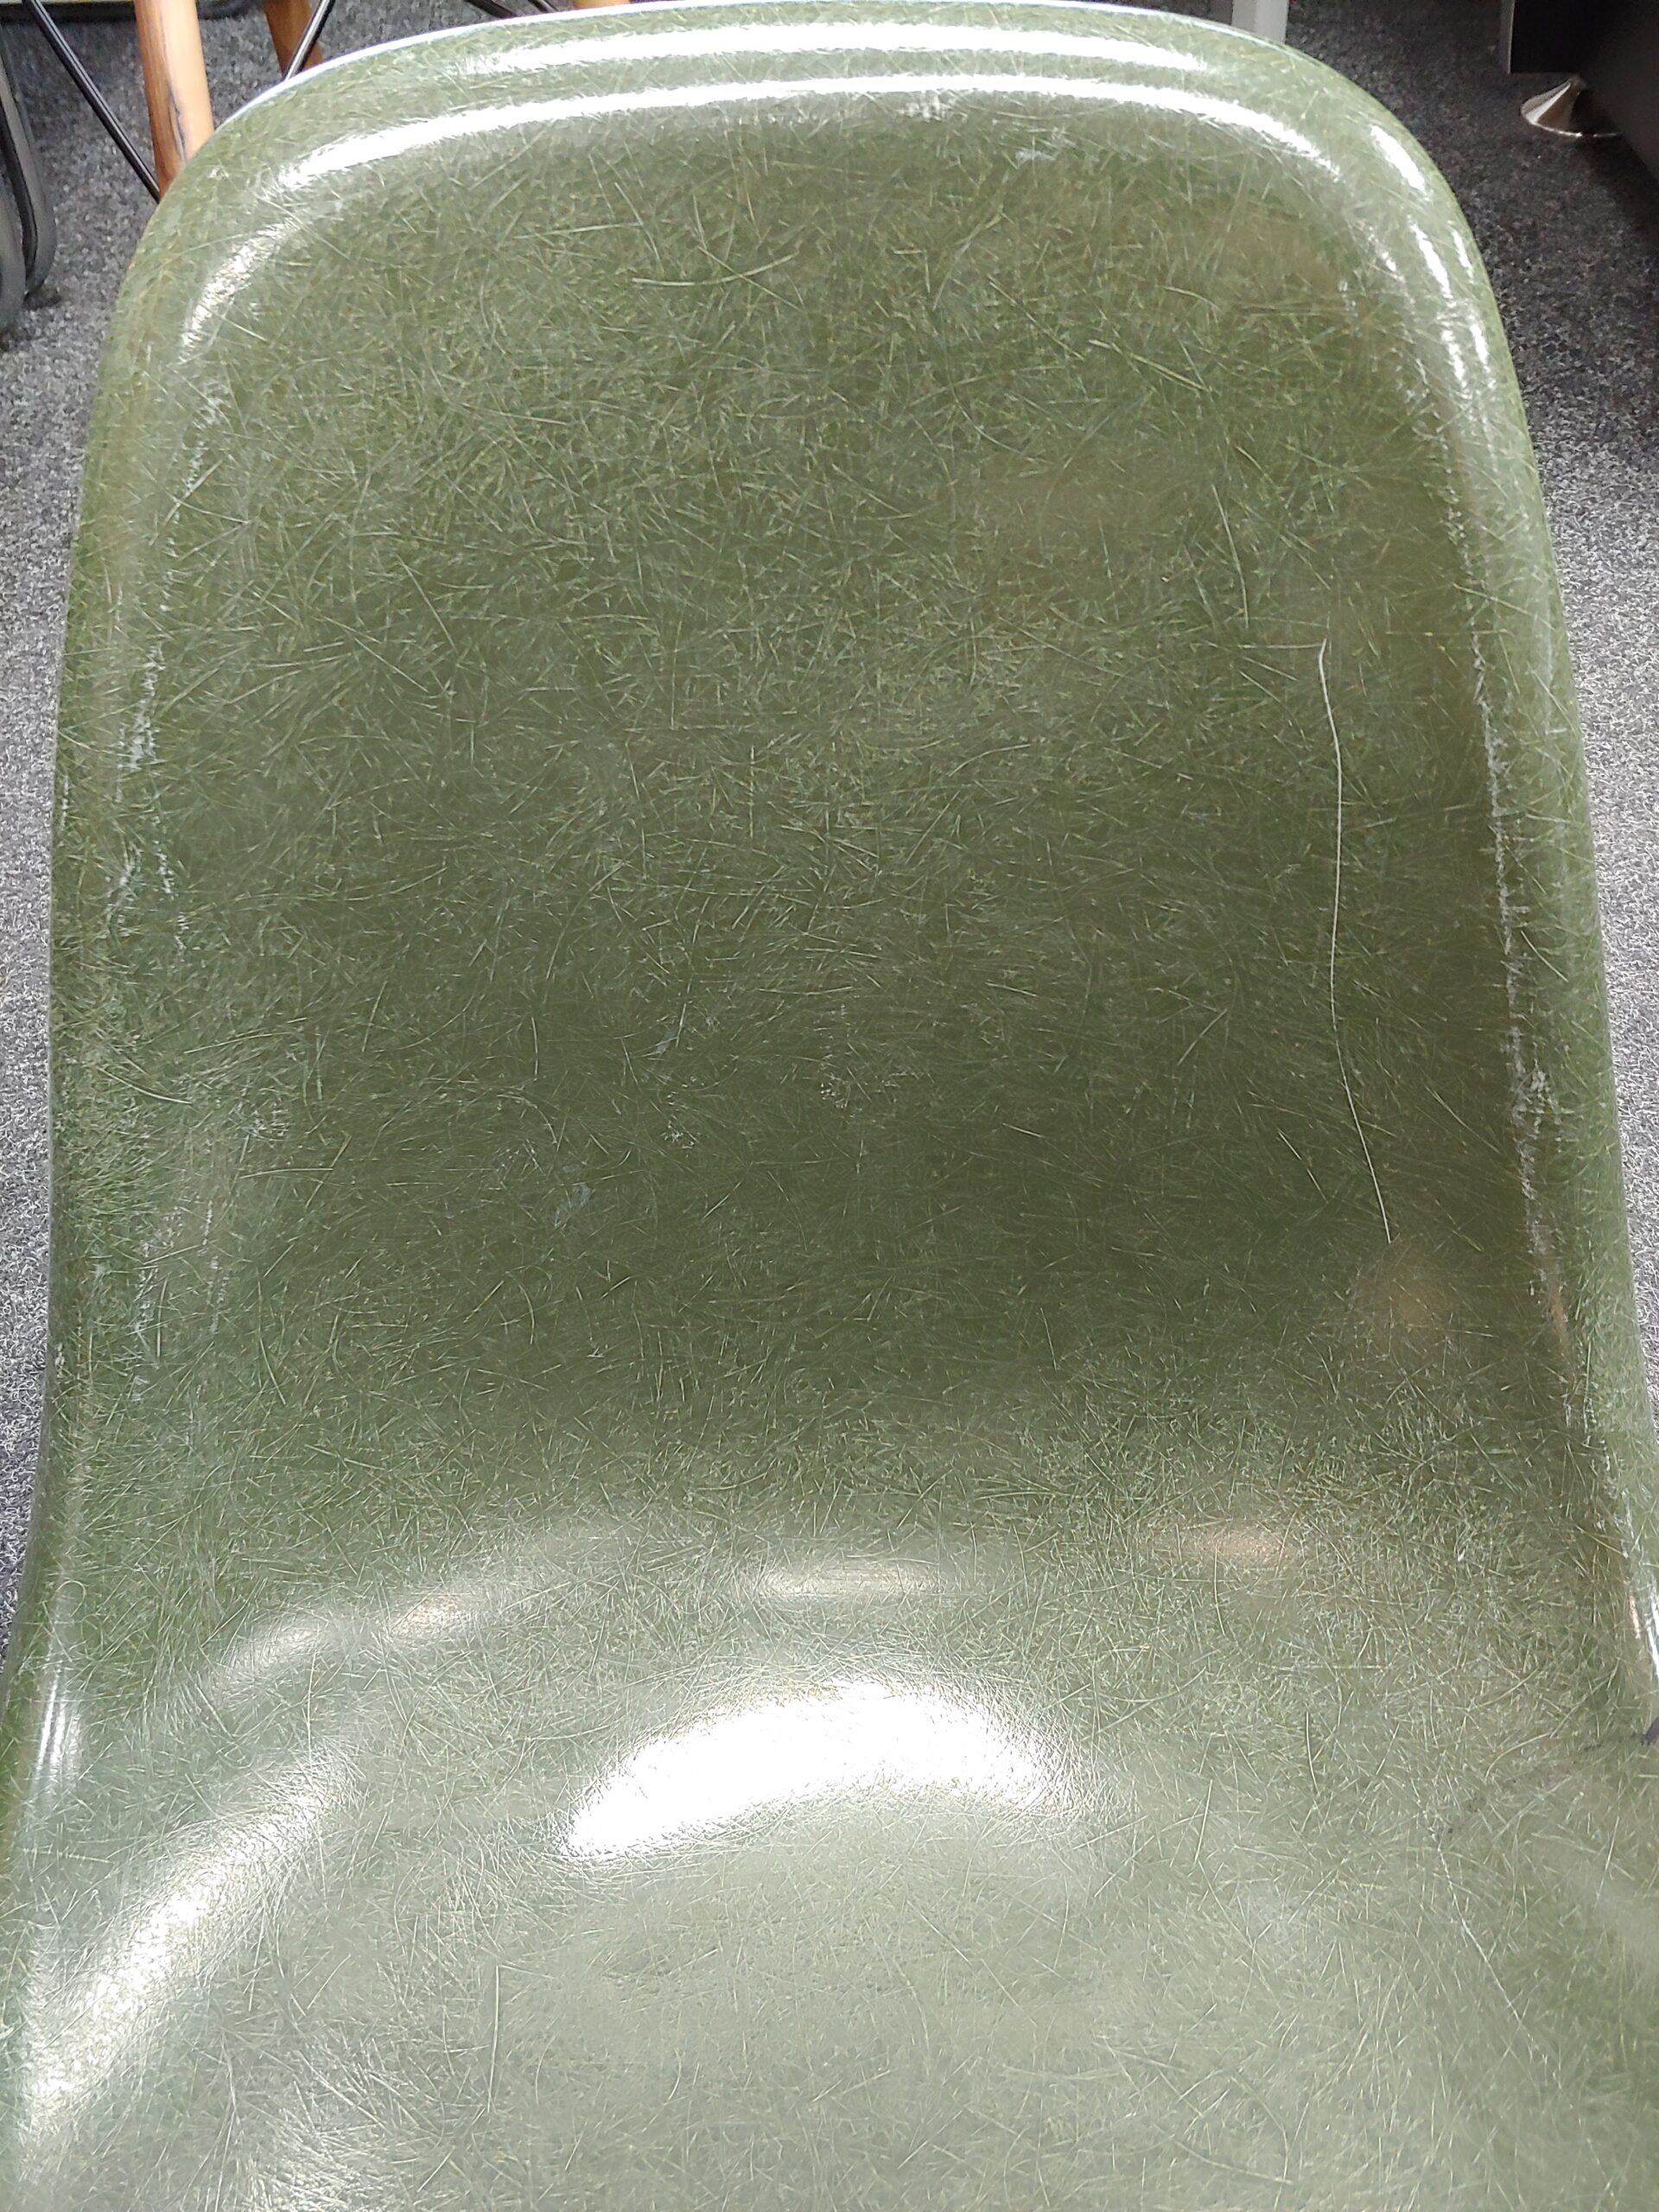
I thought I had lucked out until they sent me detailed photos of each chair, which revealed some scuffing and a few significant scratches. This is to be expected in any item that is 50 years old, of course, but I really wanted these things in primo shape.
After consulting with some friends, some people on Twitter, and some articles on the internet, I became confident enough I could restore these easily to almost new condition, so I placed the order.
Amazingly, the chairs showed up all the way from the U.K. in less than a week, and I got to work immediately.
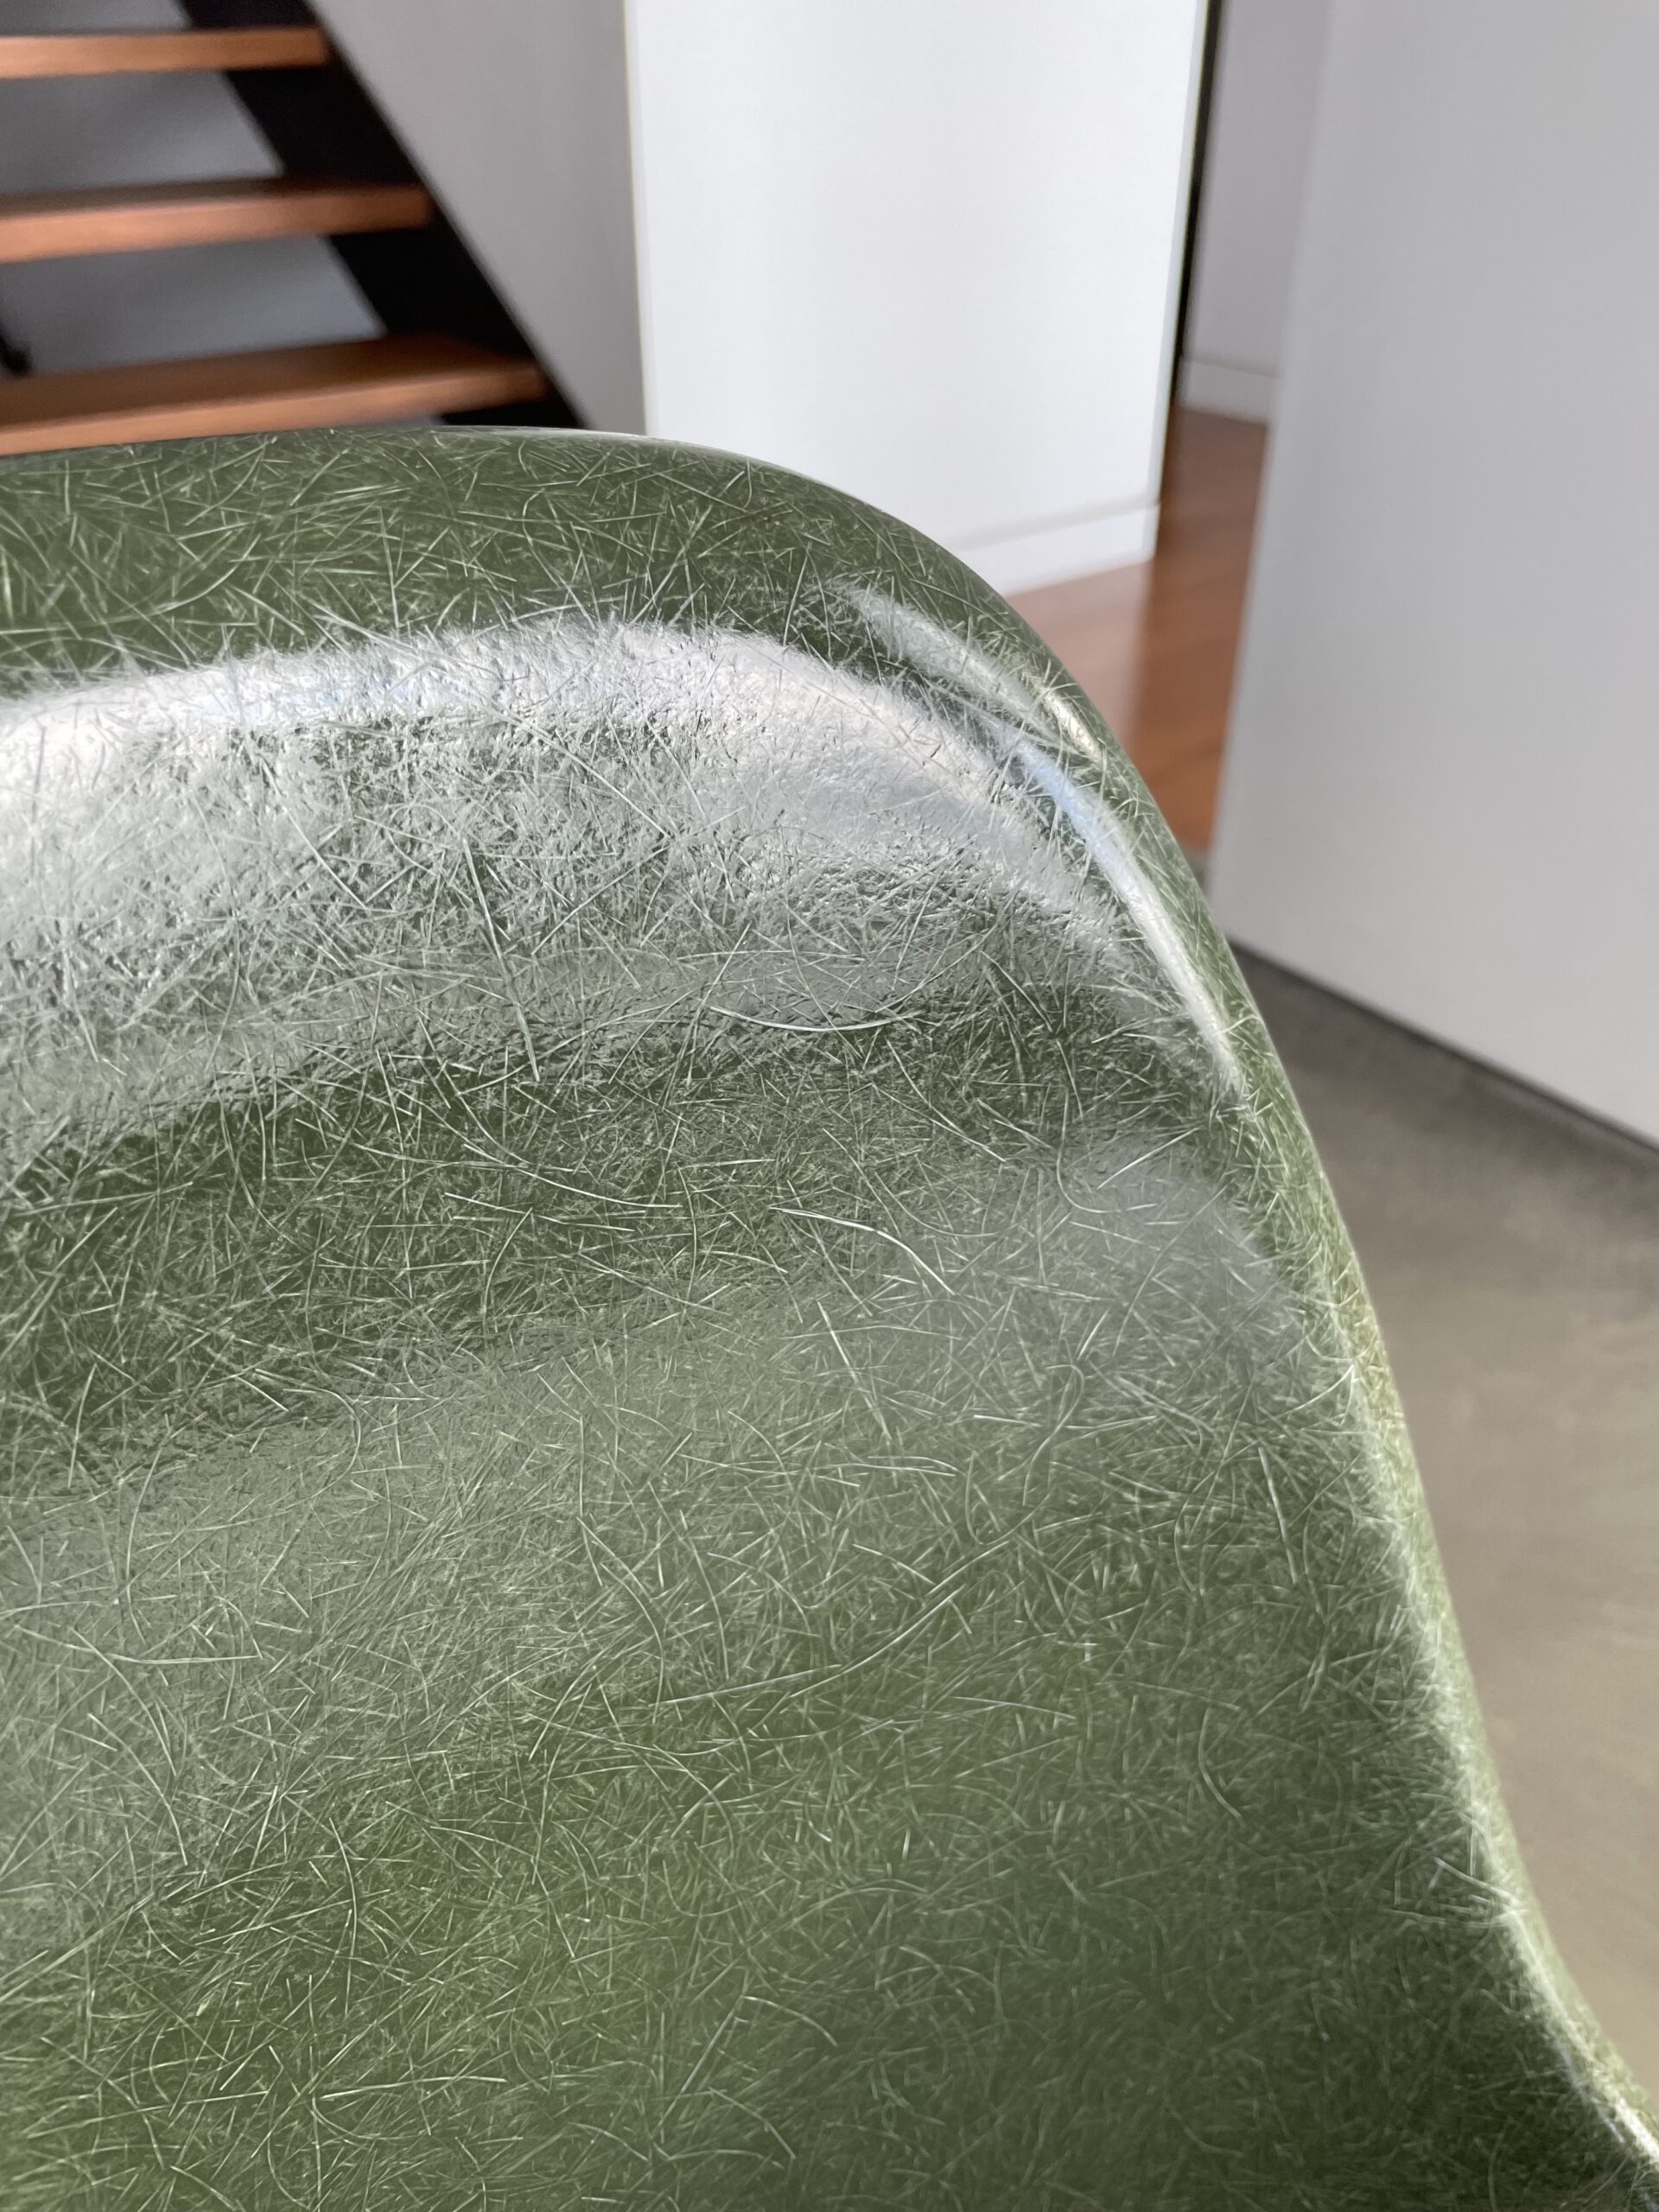
Step one was buying a couple of sanding sponges. I bought a 320 grit and a 220 grit. I started with the 320 because I was worried about scratching the chairs, but that concern proved unfounded. It was a little too fine for the job. You really need to remove some fiberglass when you’re doing this, so 220 ended up being the right strength. If your job is really gnar, you could probably go a little rougher even.
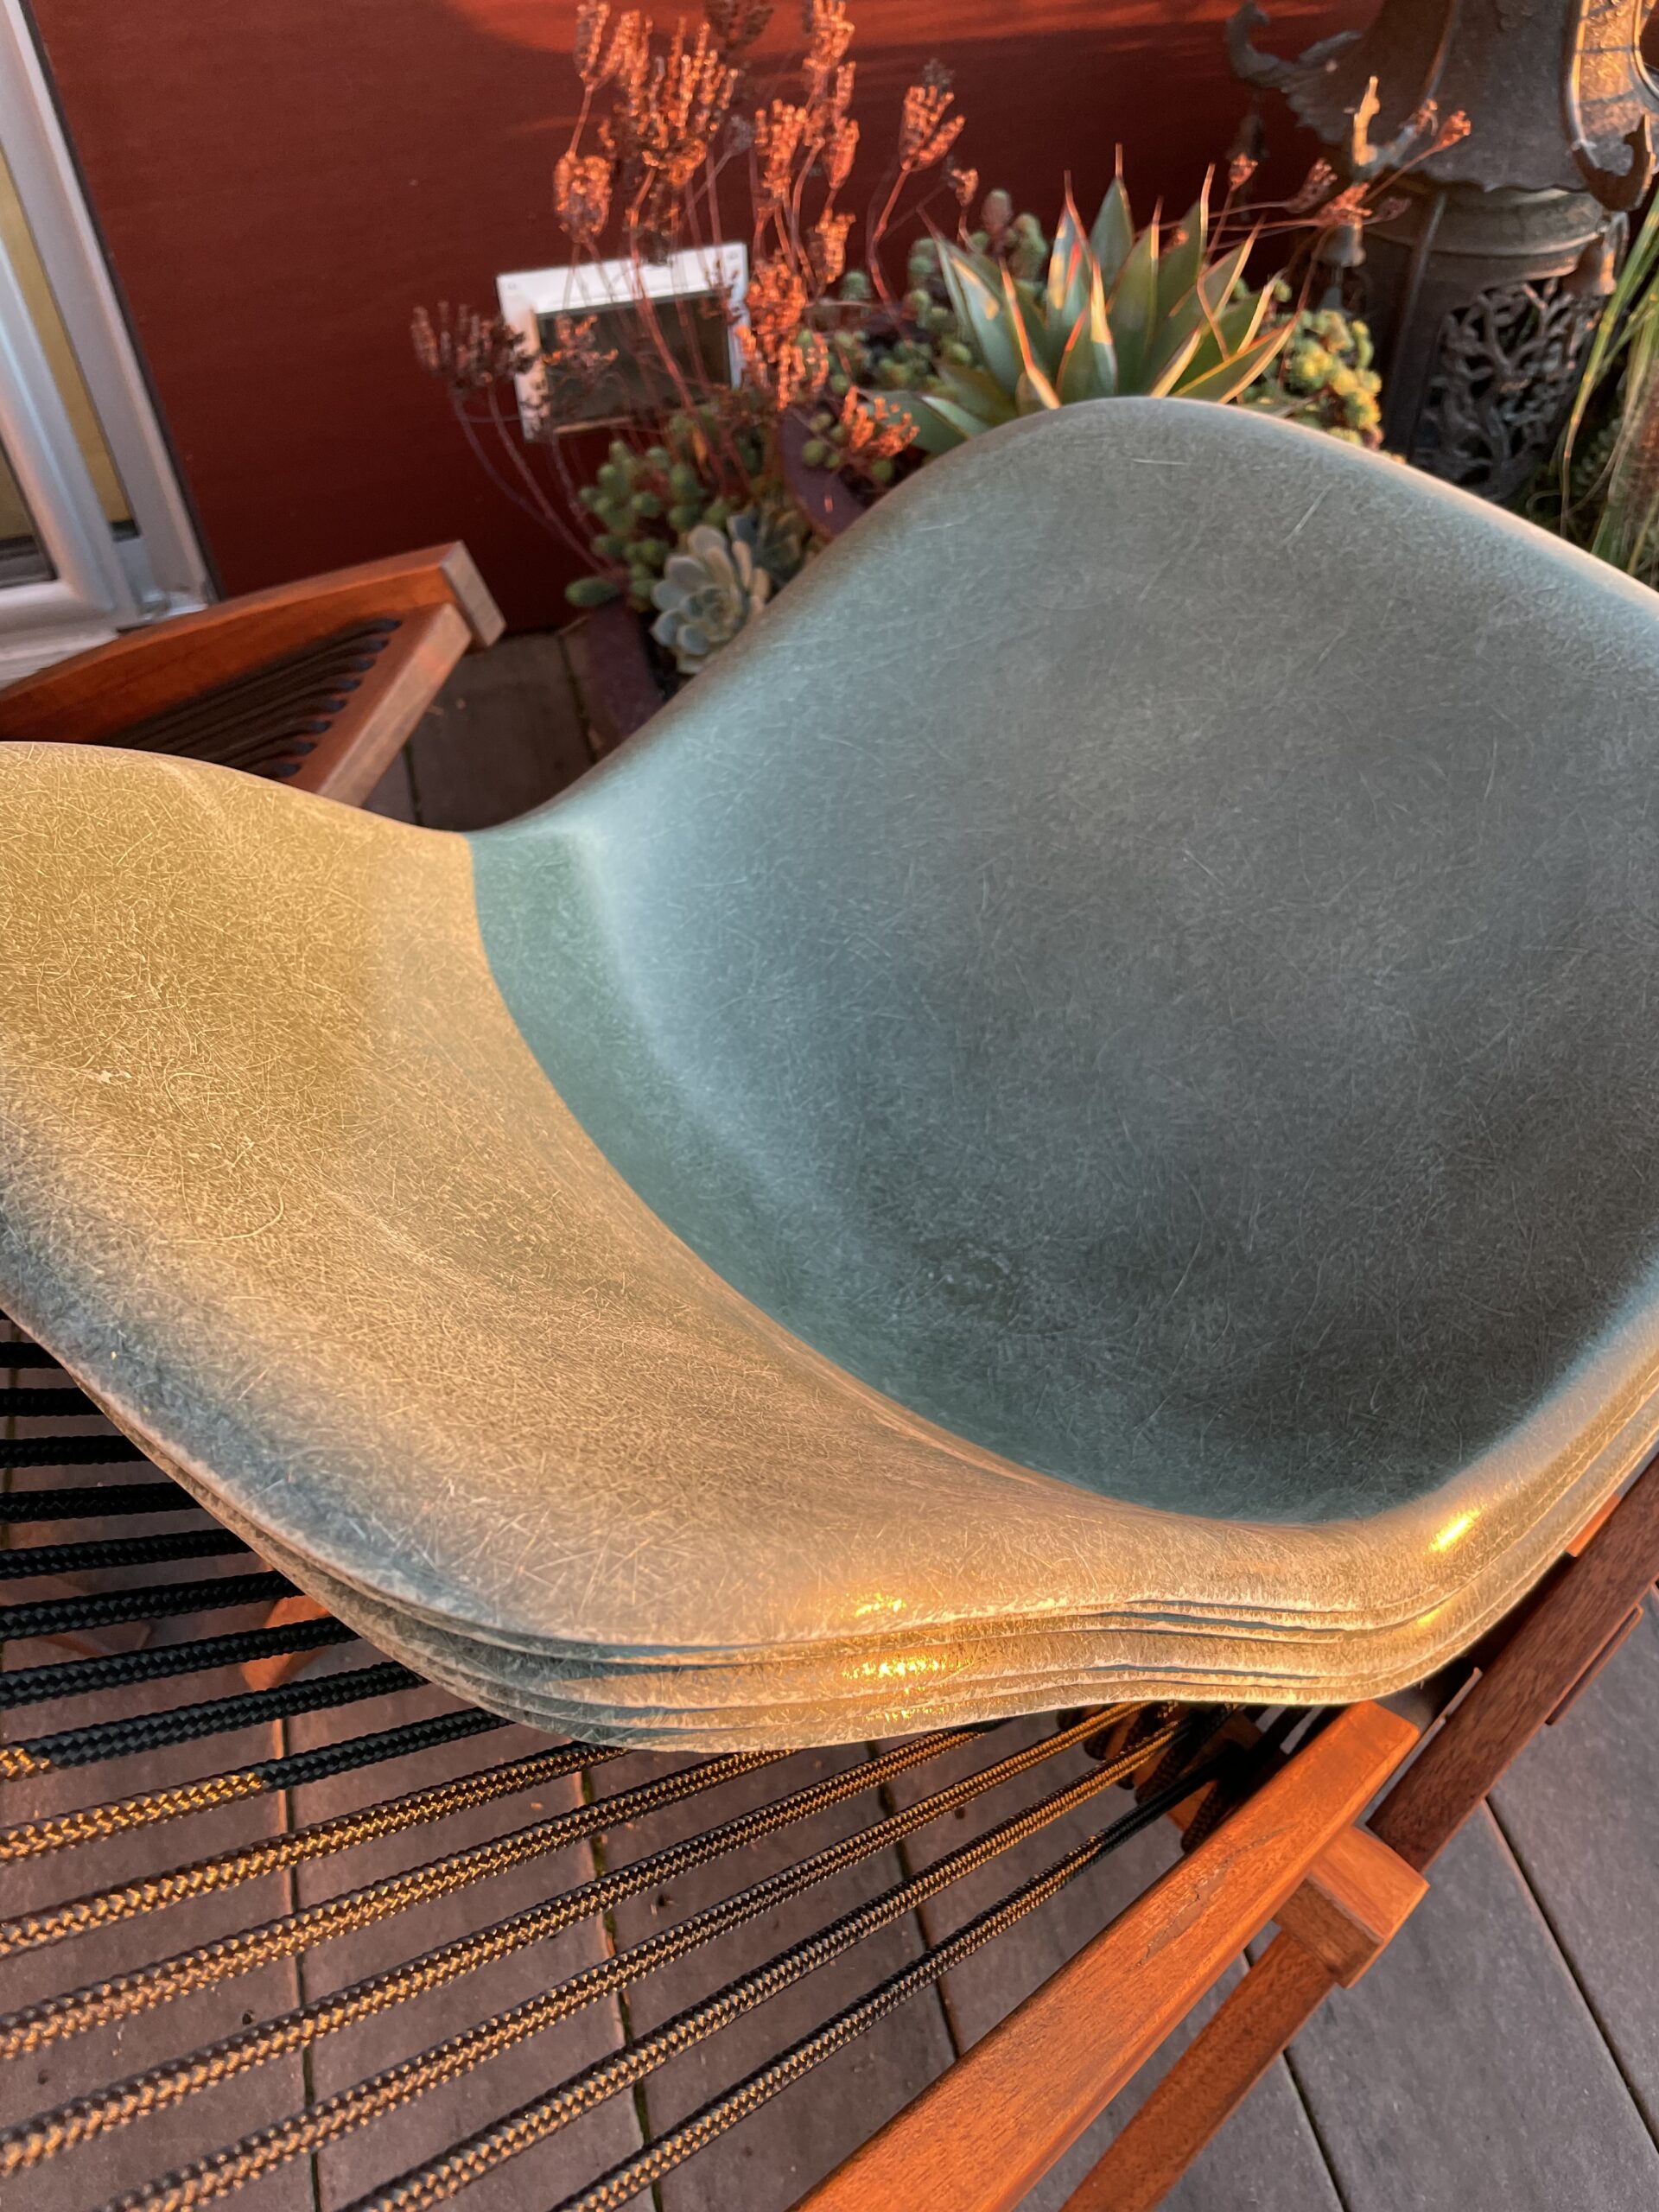
Anyway, I took the chair shells outside to the patio, and put one on a towel to work on it. I used thick rubber gloves to make sure no fiberglass debris came in contact with my skin, but other than that, just a small bucket of water to wet the sponge was the only other tool. Some people also recommend wearing a mask, but I was outside and not doing any electric or dry sanding, so it didn’t seem necessary.
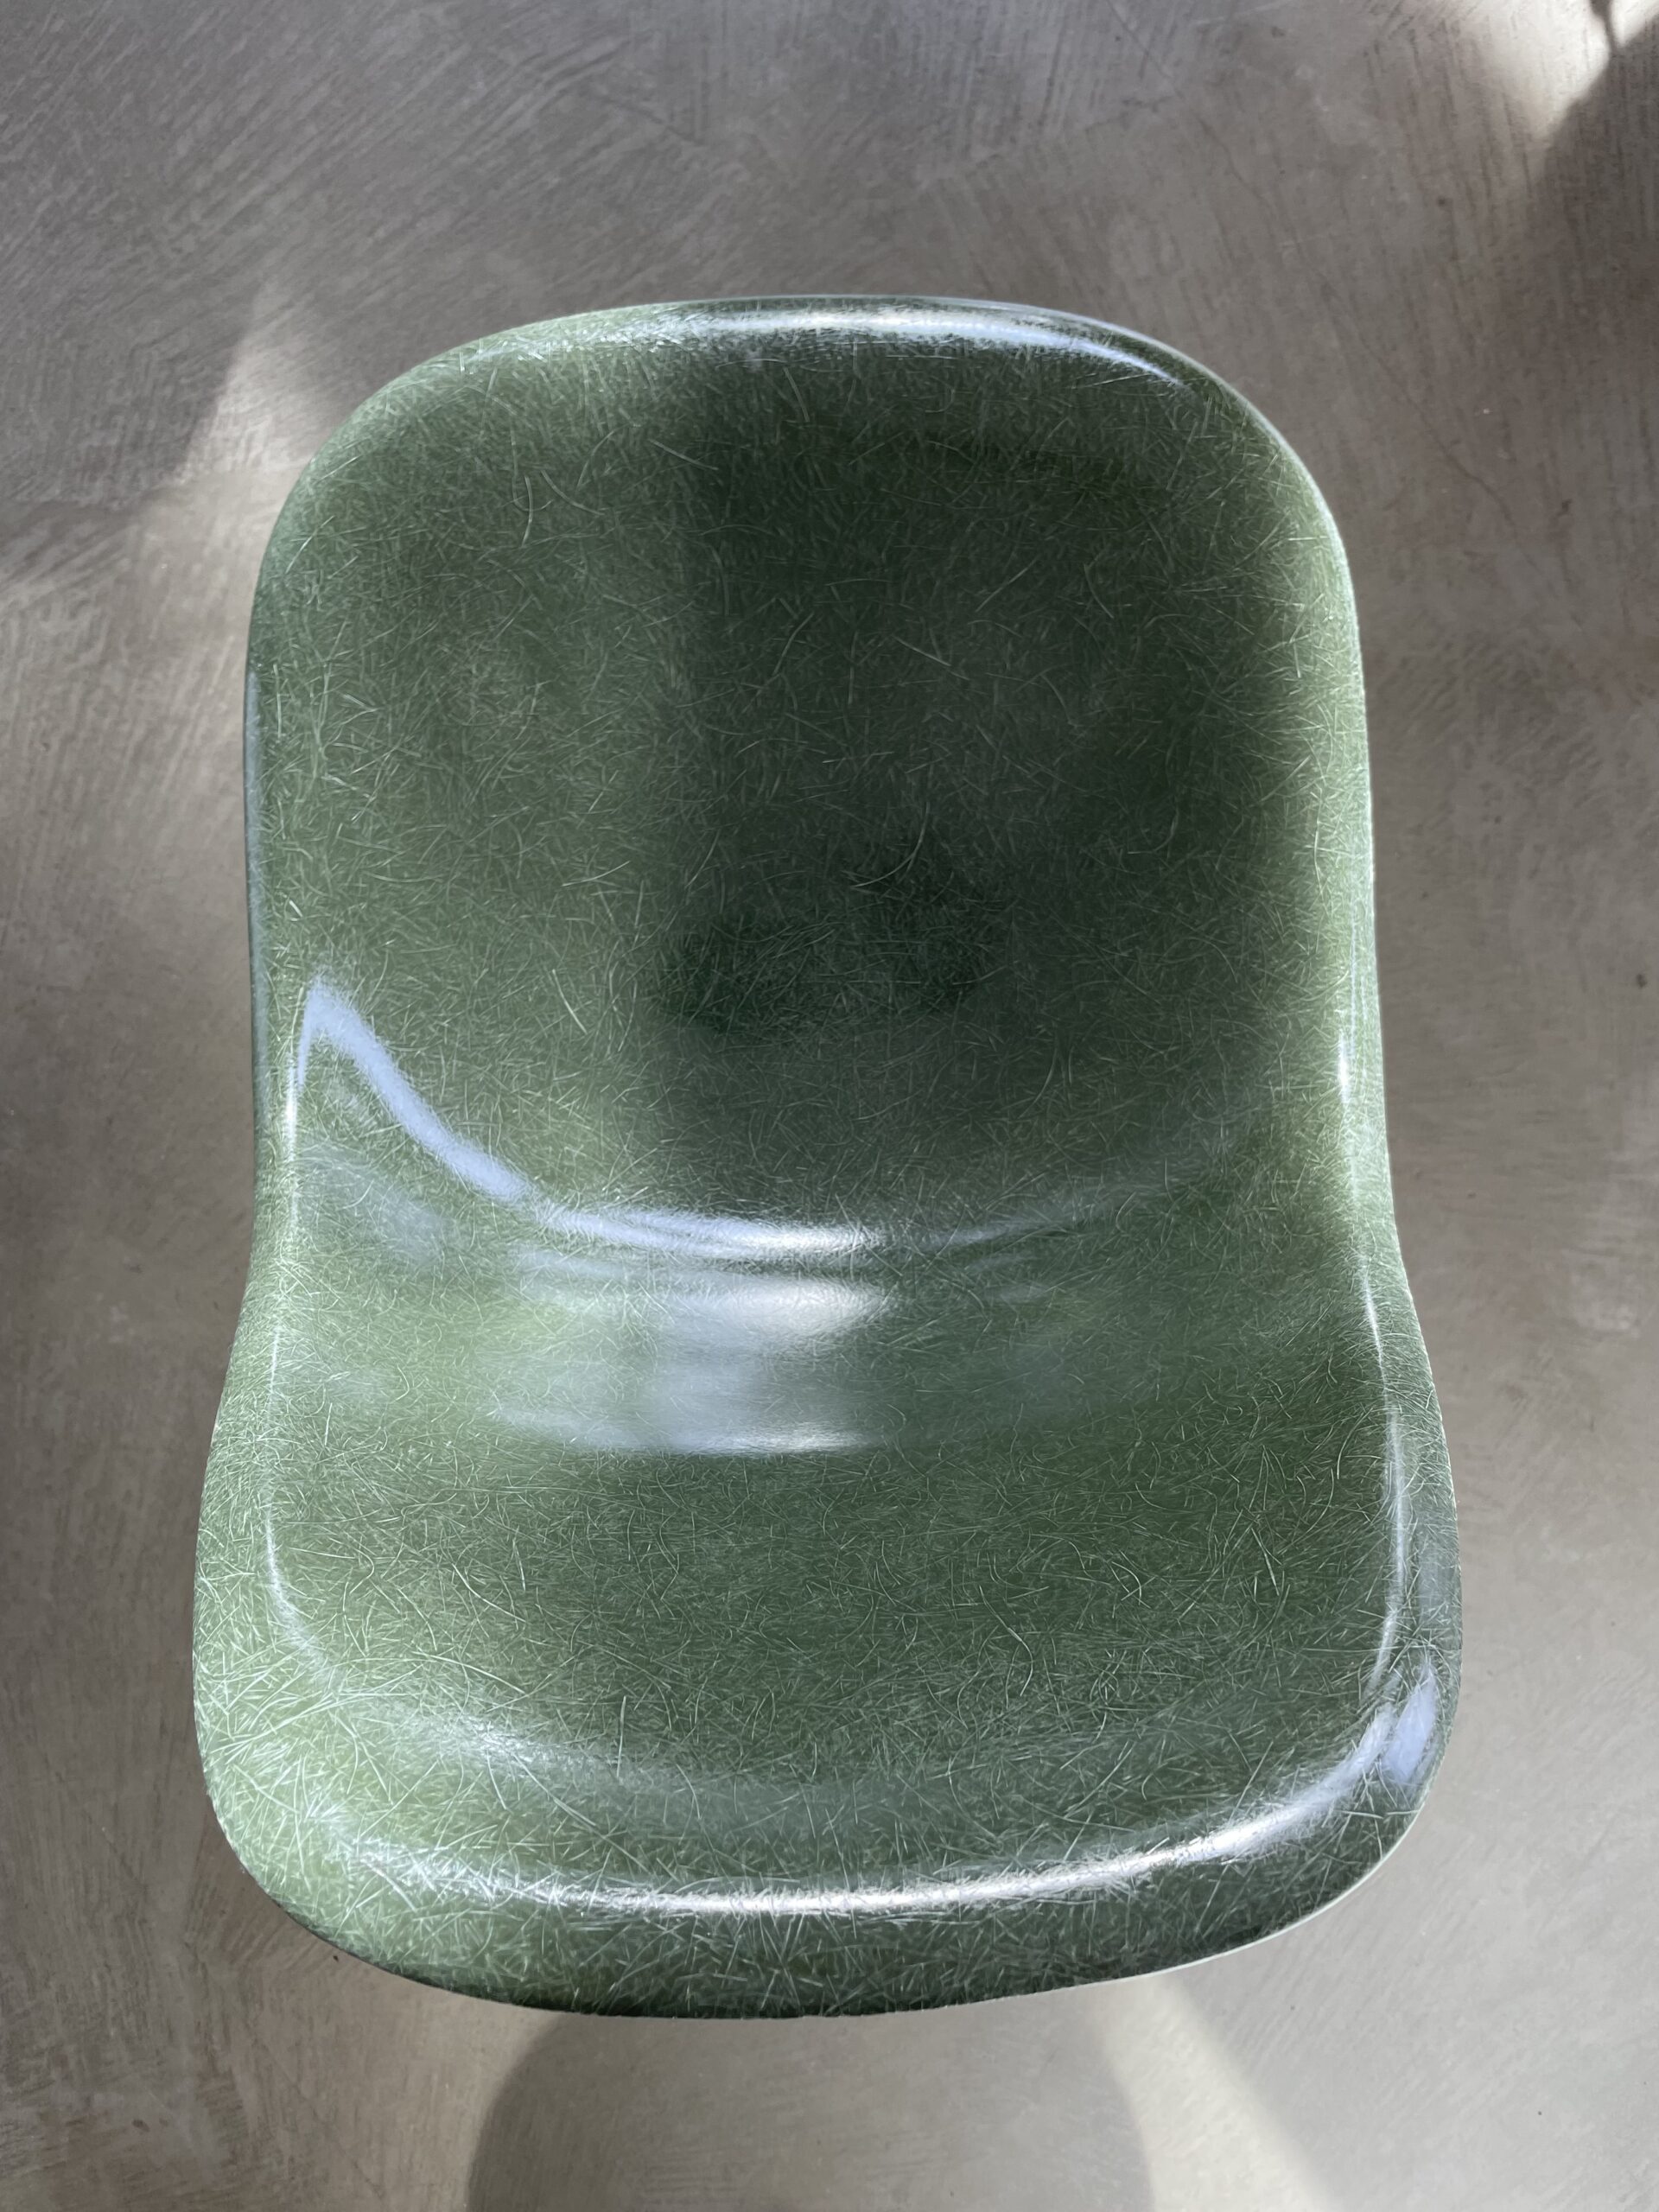
The process of removing even the deepest scratches was surprisingly quick. I probably spent 10 or 15 minutes per chair, depending on severity. It’s hard to tell if you’re completely done until the chairs dry back up, so I hosed them off, let them dry overnight, and then gave each one a touch-up sanding the next day, followed by another hose off and air dry overnight.
It’s really amazing how self-healing fiberglass is. You think you are just scratching the shit out of it when you’re sanding it, but then when you’re done, it all blends right in automatically. And that’s even before the next step, which is when the chairs really come to life.
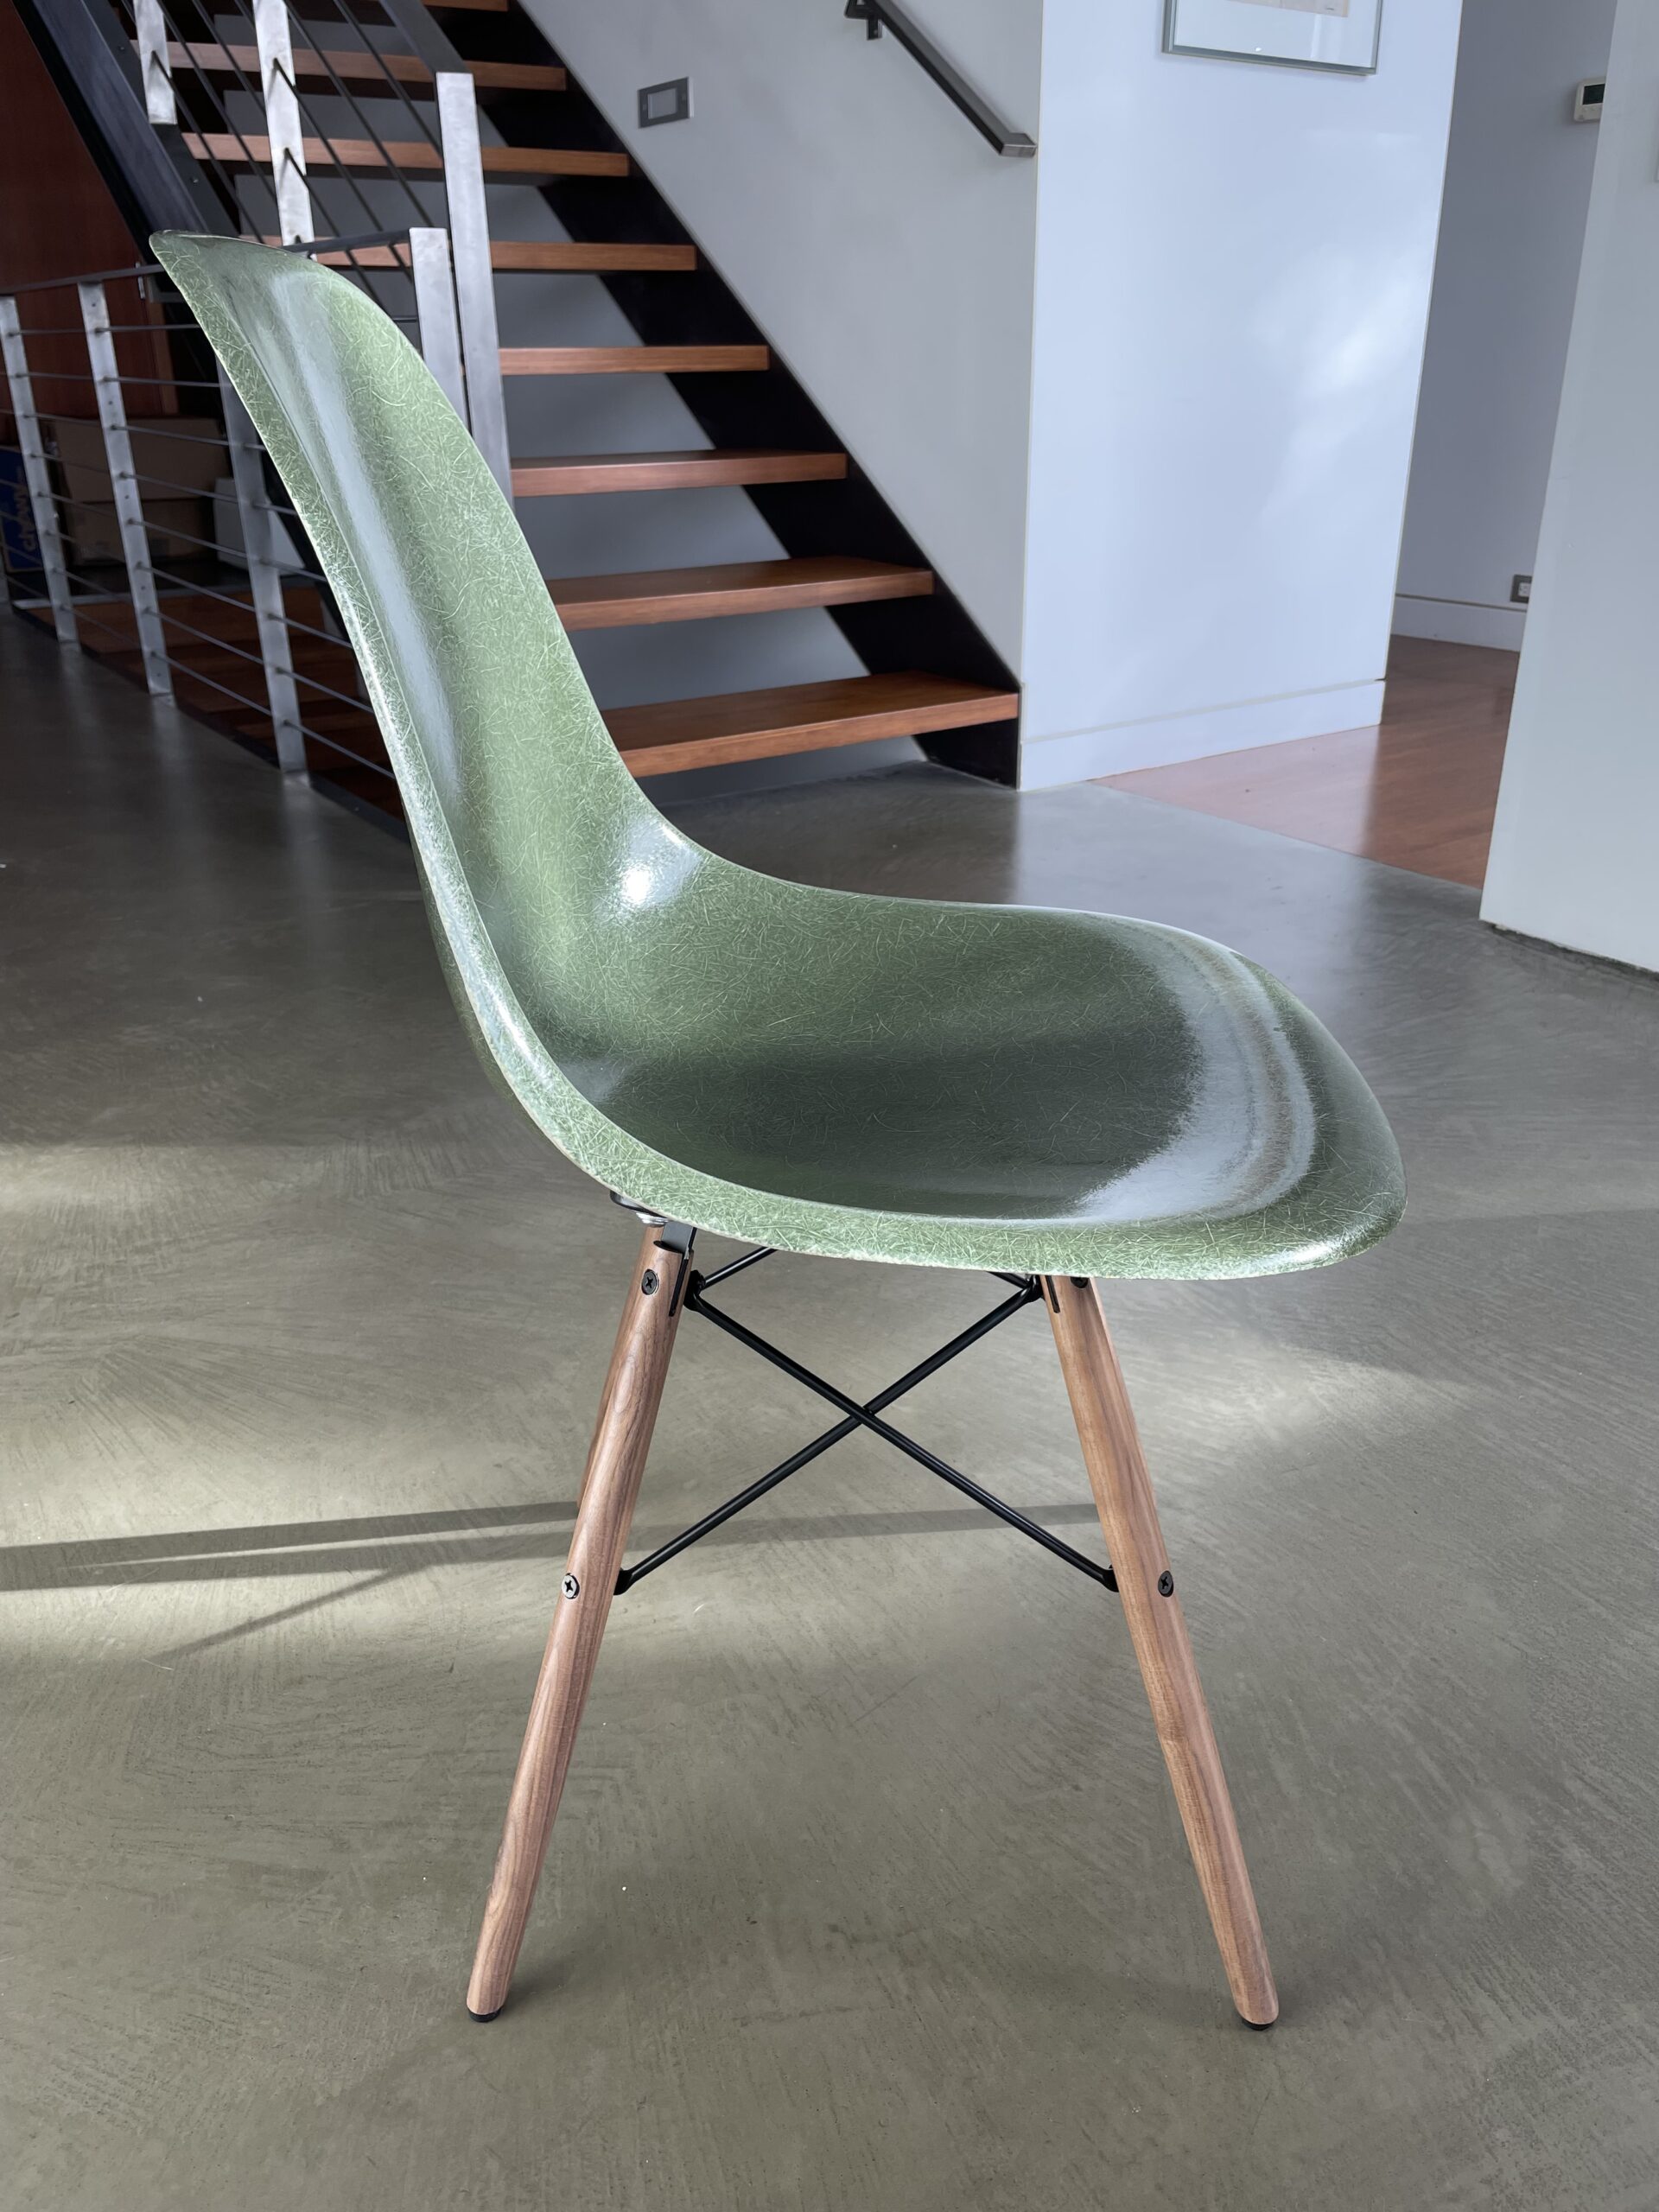
The final step was wiping on some Penetrol. Penetrol is an oil-based paint additive that happens to restore fiberglass to brand new condition. It’s really amazing, and you should be able to get it at your local hardware store. I used one of these Swedish dishcloths we had laying around, but you can use any number of other lint-free cloths for the application.
This step was even easier than the sanding, with each chair taking no longer than a minute or two to cover in Penetrol. Once they are coated, that’s when your jaw really drops. Not only does the shine look spectacular, but it also further hides any imperfections that may have remained on the surface.
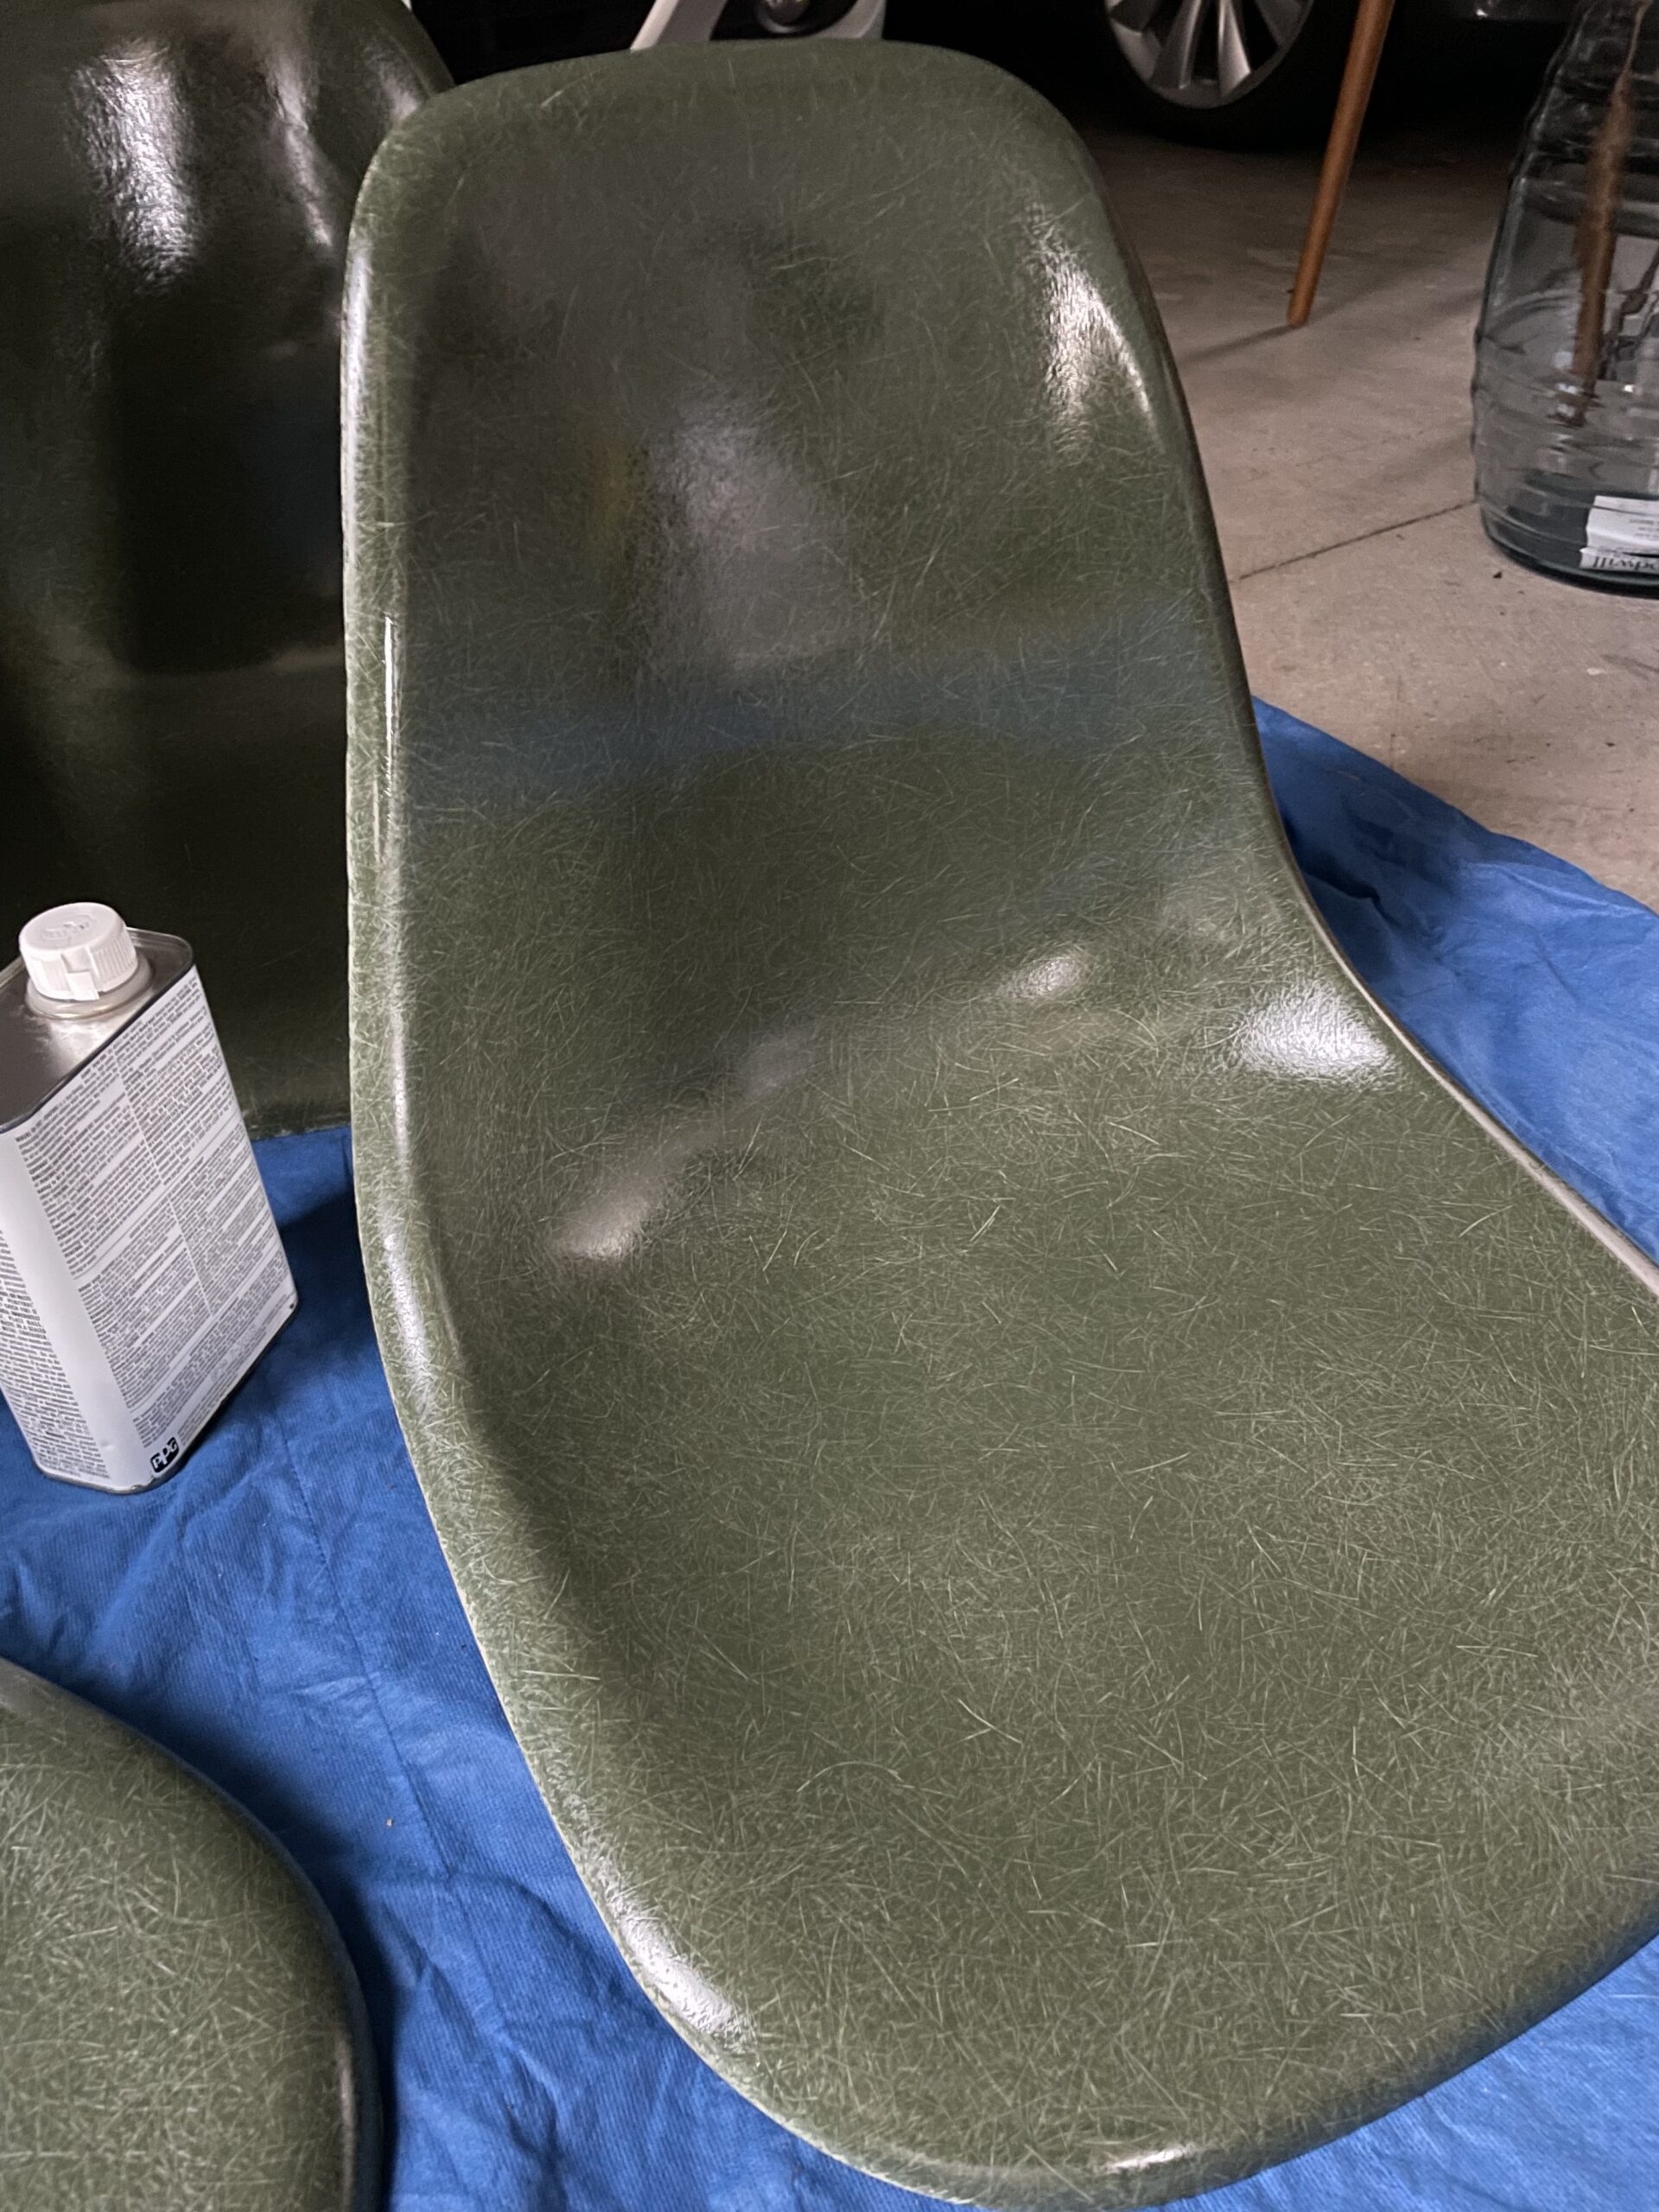
After letting the Penetrol dry for 24 hours, I inspected each chair. I probably would have been happy with just that one coat, but I did see a couple of areas where I had perhaps applied a tad too much, causing a bit of a run. Not a big deal, but I decided to just give them all another coat to smooth out the runs and also provide more protection.
One coat and 24 hours later and they were looking perfect! The last step was to assemble the new dowel legs. This proved to be the most difficult part of the whole project as each chair took about a half hour to assemble. Granted, I was watching football as I was working, so perhaps a focused person could have gotten it done quicker.
Anyway, below is the end result! We’re so happy with how these turned out that we are now looking for two more in another color for the ends of the dining room table. It’s great to, a) get something vintage, b) save money, and c) re-use an existing object rather than cause a new one to be manufactured. Win-win-win.
I encourage you to go on your own Eames restoration journey. It’s not very difficult, and the extra effort you put in will make you appreciate them even more.
Great post! You’ve inspired me to clean up my chairs which are navy. Did you have to deal with any banged up edges on your chairs? It’s the only area I’m struggling to restore to a smooth surface. Sanding only exposes the fiberglass hairs even more. Any insight would be appreciated!
@James: Yeah, my edges weren’t too banged up other than what you mention… some threads starting to get exposed a bit. I wonder if there’s a way to coat the edges with resin or something.
Hi. Great article. Many thanks. I recently got the EU equivalent of Penetrol, called Polytrol. My chairs are in pretty good original condition with just a few minor scratches. Despite the excellent results that can be achieved, I’m a bit worried on how the Penetrol/Polytrol-treated surface will wear and age. After all, sanding forcibly removes part of the original gelcoat, and to me it’s not clear whether the Penetrol actually binds into the surface and actually smoothes it, or merely provides a visually “wet” coating that gives the shell such a nice and like-new appearance. Since your chairs were done over 1 year ago, it would be great if you could share how they have been aging under normal wear. Many thanks and kind regards, Helder
Hi this is Michelle in Logandale NV. Do I add the Penetrol to paint? Thank you
Hello Mike,
I have a c.1960 white shell arem chair with aluminum legs. The exterior side of the back has developed some yellowish splotching. Do you think your sanding process will remove it? Also any recommendations for cleaning the legs? Thanks for any info you can provide!
The only thing I wish you would have done, that you didn’t, is show the front of the product can. LOVE the results, and you have inspired me to refresh my teal, Herman Miller bar stools. Excited and looking forward to the finished project.
@Helder: I applied Polytrol more than two years ago, after sanding, just like Mike did. They still look the same (they’re used daily as dining chairs), so the coating holds up pretty well.
@Michelle: No, no paint is needed. Just apply the Penetrol undiluted in a thin layer. Basically making it wet, no more than that. Let dry, and apply a second layer if needed. Then let dry / harden before using the chair. It feels a bit sticky the first few days, so best to be patient and wait a week before use.
I just bought some used chairs like this but the legs are in pretty bad shape. You mentioned that you assembled some new dowel legs in the post. Where did you buy new legs?
Thanks Robert!
Hi! I have very similar chairs and am having trouble finding Penetrol in Canada. Is there any other product that’s similar? Thinking boating supply stores must have something? Thanks!
@ilona I’m in Canada as well, and trying to solve the same problem. Did you find a similar product?
Thanks for the great post! My girlfriend and I are moving in together. She has a cat and I have 2 vintage Eames Fiberglas chairs. A combination that makes me quite nervous. Have you found that your cat has scratched your chairs?
Nope! Completely cat-proof!
Thank you for a great post! How did you reattach the legs? I have a circa 2016 Eames fiber glass chair and two of the “pucks” which support the legs have detached. I’ve been told from official sources that the chair is unrepairable. That seems to be a really unfortunate position to take. The chair is in otherwise perfect shape and it also has the dowel legs like yours, so I’m hoping to not give up!
Definitely still wear a mask outside. Unless you are wet sanding that dust is allllllll up in the air around you. Nice results!
Thanks for sharing your experience! Great results.
@Kim Janas: This is a good resource for Eames chair replacement parts: http://www.modernconscience.com
Great guide! Did you use anything to seal the fiberglass like a clear coat? Or did you notice fiberglass particles on your clothes when you sat on the chairs? Just picked up a couple chairs from the curb but worried that sanding would remove the gel coat and let fiberglass particles go everywhere.
Nope. Didn’t have to use anything after the Penetrol.
I found Penetrol but there seems to be different product in the line
I have a similar chair in white
Someone had painted with latex and I fear spray paint
The latex came right off
Unfortunately I disturbed the fiberglass
Yes, fiberglass all over
Any product suggestions that might help me with removing the fiberglass shards from my arms
Mostly I’d like to return the chair to the original luster as you
Beautiful work, btw…
With kindest regards